Thursday, May 10, 2018

Orange Peel Pillow - 2 for 1 month


This fun project is a combination of work for 2 groups.  Island Batik provided the fabric and the International Association of Quilters gave me the pattern to work up as a project lead for this freebie for members.  

The challenge for Island Batik this month was to make a pillow.  I thought the project from IAQ was just perfect. First up - picking fabric.
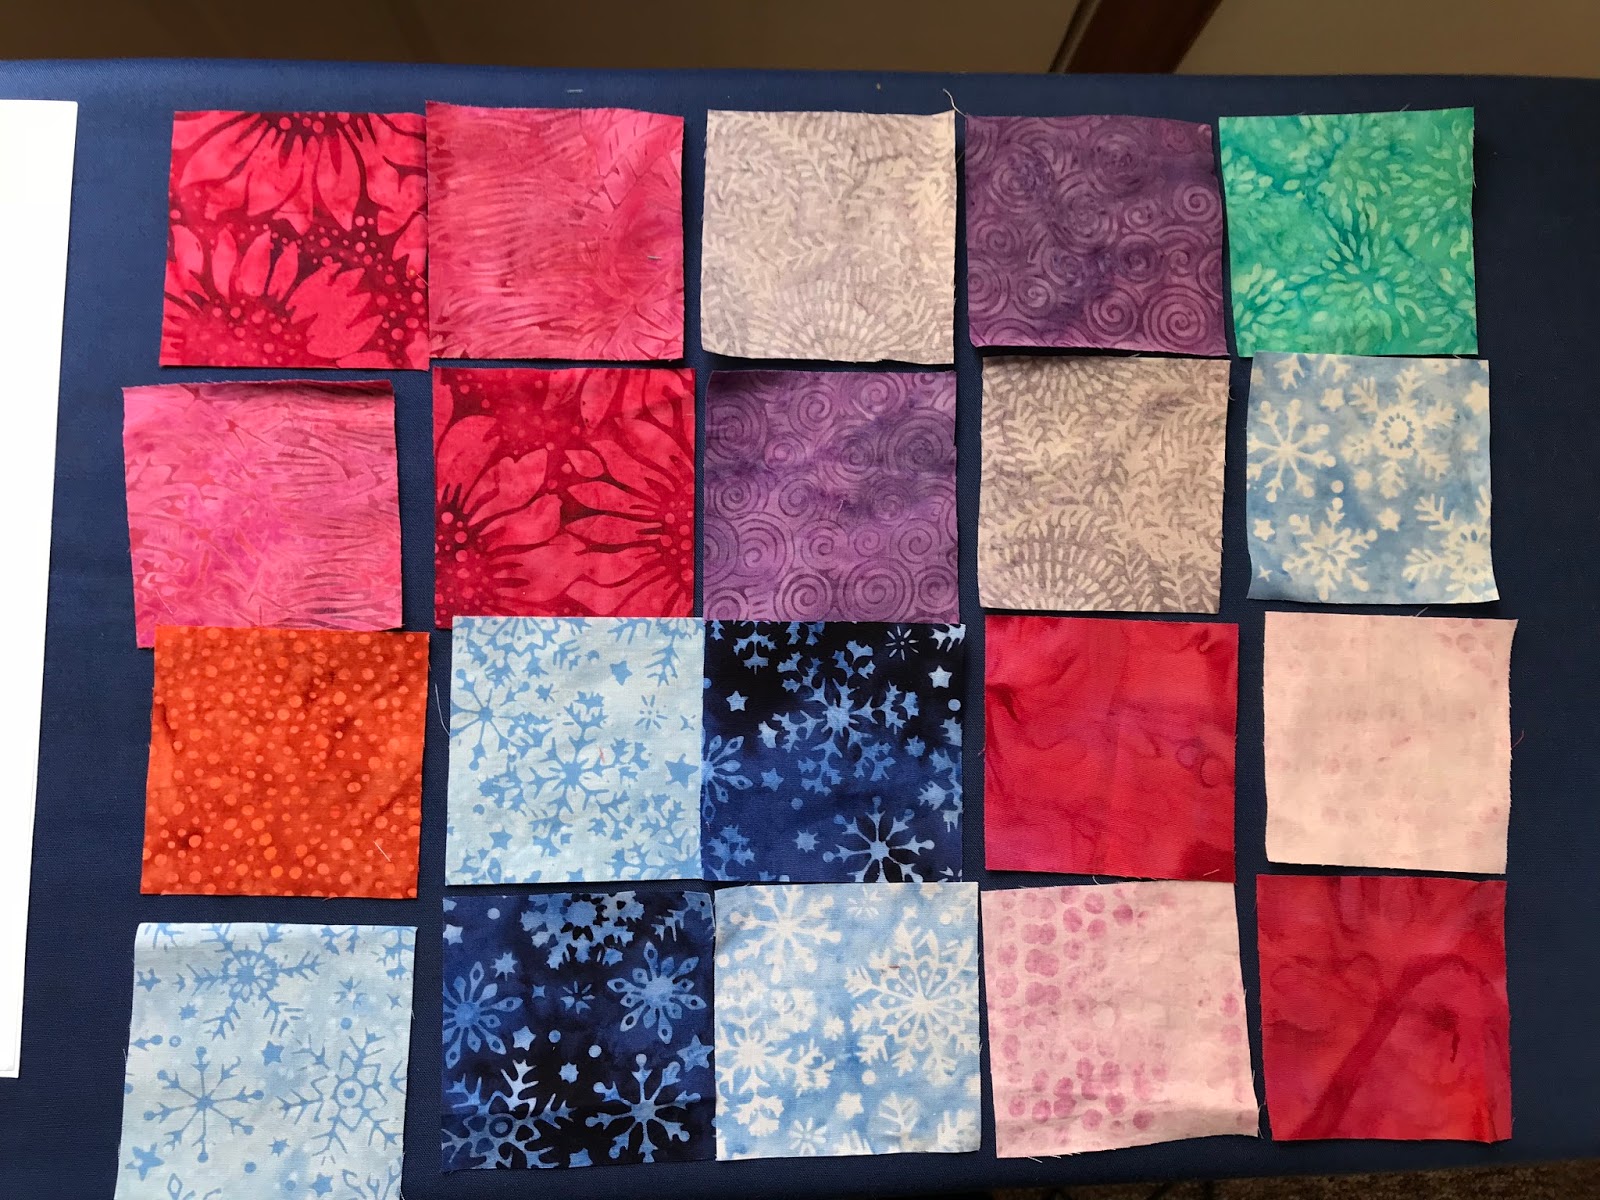
First, I laid them out in what I thought was a pleasing order.
Per the instructions, I sewed background and "peekaboo" fabric together.  
Here is what the back looked like.  Then I decided to add another row, in order to make a square pillow.
I auditioned a few of my scraps, and then added the rows like I did before.  My fabric choices were dictated by which Island Batik fabrics I already used and had some scraps.  This is my first year as an ambassador, so I am being a bit conservative with my larger pieces until I have a sense of what I will need through July.  
 Mark the orange peel, lightly, on the fabric.  I am partial to Sewline pencils, but whatever you do, use a light touch.  You can see the marked orange peels on the assembled quilt.  I cut on the line - so no remnants are left behind.  Remember:  what you see is what you get!

WHEN MARKING THE ORANGE PEELS:
Think about seams and quilting through them later - give yourself 1/4" near the seams to save you some difficulty in quilting later.
The orange peels
With the centers removed
I make a tiny slit first, cutting very carefully the slit in the center of the top fabric.  Then I cut towards the side and around, which will reveal the orange peels.  Trim nicely, as these edges don't get turned under.  Some reverse appliqué does, but this pattern did not call for that.

The next step is to layer with batting and a backing, I used safety pins to hold it together because I was hand quilting.   Since mine was going to be a pillow I didn't worry too much about the fabric I used in the back.  I quilted with a variegated 12w thread from Valdani.  I tried to get my stitches more even on the front than on the back, again knowing this was going to be a pillow.  

HINT:  use a needle that can be threaded with the weight thread you will use AND can easily go through your layers.  I had to try a few until I found one I liked (remember batiks are a little harder to quilt but the right needle helps).


I then picked a binding.  I needed 48 inches so I needed more than one strip - so I used the reverse of a Christmas batik in red, as I liked it the best.  Sometimes there are two sides to a batik, and sometimes you need to use the back side

I decided to use the envelope method, so I first cut two pieces that were about 12.5" x 15".  I turned one edge on each down, pieces now measuring about 10".  I then top stitch along each edge.  Sandwich on and sew on the binding to the front.  Hand sew to the back.

HINT #1:  I like bigger pieces so "the belly" of the pillow doesn't peek out!

HINT #2:  Backing and Binding are sewn together.  WRONG sides together for front and back.  The binding is attached to front and turned to back (like most quilts).

A simple pillow insert was made with poly fiberfill.  I measured the pillow from the back and made the insert that size (2 pieces cut 12" square).  Sew up on three sides.  Stuff and test the insert in your pillow, add more fill or not, close up the insert!  Stuff it into the pillow and you are done!

Voila - your pillow is done!


Tuesday, May 8, 2018

X Block Blog Hop - Venetian Tiles


Disclosure:  *items are affiliate links 
 If you purchase from that link,  it does not affect your price,
I earn a  small commission to help defray the costs of blogging.

Today I am thrilled to be a member of the X-Block Hop (and there is a giveaway!). I found out about this hop from Amy at Sew Incredibly Crazy  A friend of hers, Doris Rice, is the new owner of the X-block and so, to help her friend, a blog hop was born.  I was excited to join as I did have a lovely quilt that I made using that technique.


 I love the X-block tool and the intricate designs you can make by trimming a 9 patch.  Yup - that's the basic gist of it.  First you make a lot of nine patches, then you cut them up.  Sometimes that feels wasteful, but here's the thing - you are not piecing wonky angles BUT buy cutting a block differently you get the effect of the odd angles. 

I loved, loved, loved this pattern.  I thought it would be perfect to use up some batiks I had collected.  The ones I was using up were the more solid/light fabrics in the quilt.  I had collected them for my Whitby Abby quilt - it appears in the beginning of my blog, but I actually never wrote an entire blog on it. You can even see some of these batiks in the link above, in the second picture.  
These are the two tools I used, the 6.5" X block template* and the BellyButton 6.5*.  I think the way the colors play off of one another and that the design is so interesting.  I was looking for a colorful sky so all these light batiks have blues and some pinks in them.  It is such a cheery quilt and  perfect for a summer quilt.  The guest room in our cottage is dark and it really livens up the room.
Here are a couple of hints for making this quilt:
  • Starch your fabric (bias edges behave better when starched)
  • Pay attention to the directions (I know - simple but true!  there are Right and Left facing cuts)
    right facing block
    left facing block
    Teal square shows the Right Block, Orange is Left Block and
    Dotted Line Square shows 4 blocks making the diamond.

The pieces for the sides and top are made from some leftovers, if I remember correctly.  They were totally worth doing.  I wanted to use this on a queen size bed, so a few borders and it works!   Notice,  the top and bottom borders are smaller so it will fit my platform beds easily.   Finally, I quilted this on a longarm and loved doing it.
Hanging at the Rising Star Guild Show
Enjoy the hop and check out the other bloggers that are hopping!

May 8th

May 9th

May 10th


Look at this X-treme XBlocks Bundle!!!


a Rafflecopter giveaway


Disclosure:  *are affiliate links 
 If you purchase from that link,  I will earn a small commission.


Sunday, May 6, 2018

One Monthly Goal - Rescued GFG


My one monthly goal is to do the binding on this grandmother’s flower garden.  

It is not from my family and the family that gave it to me doesn’t know who did it and kept a few other quilts that were completed, but didn’t want this one.  So I call it my rescue GFG - have to come up with a better name.  It will either go for a church benefit or a donation (maybe to a family getting resettled - either refuggee or homeless)....
It is quilted.  The binding needs to be cut, sewn together and applied.  Application will mean cutting off some of the edges; more on why I feel thats okay later.  

Friday, May 4, 2018

Busy times and a few things that are coming up!


This is my Island Batik Pillow for May, and an IAQ (International Association of Quilters) Project.  I will help folks find their way through this pattern with a few suggestions.  It is all done, but I haven't blogged about it yet.


These are my fabric pulls for Sandra @mmquilts.com Adult Plus Playtime QAL.    I couldn't resist as I had so much fun with hers last year - also another shadow quilt and I might be the Kathleen in her blog that called the Shadow Quilter....only the shadow knows!  I like both the blue or green for the background - although black looked good too..... 


I finished the napkins for the table in Maine. Wanted something more in keeping with the color of the placemats I made on our quilting weekend.  
Some of my friends also have me pulling fabric for Tish in Wonderland's QAL.  I think it is relaxed enough that I might get it done.  It will use up stash, so that's a good thing.  Still working on it, but here are a few options. 
I am hosting on May 10th for the X-Block Blog Hop.  I made a quilt that I love a bit ago and am thrilled to share it during this hop.  You can see who else is blogging by clicking on the image.

Carol at Just Let Me Quilt has organized a Star Blog Hop later in the month.  I'm on for  May 25th (and entertaining friends) so I'll be catching up in the between times!

I am doing the binding on this gem!  I rescued this and had it quilted.   I am "straigtening the edges" so it can be bound.  Binding is halfway on...more work tomorrow on it.  It is not the way you would preserve an heirloom, but I'll explain my approach later.

So there has been lots of prep, and very little time to blog the past few days.  Hoping to get a few more entries out over the weekend and early next week.

Happy Friday!


Wednesday, May 2, 2018

#365DaysOfArt - Week 15 #113-119

#113 Draw an animal out of cut-out pieces of paper.
The leg and nose are way out of proportion and I had no colored paper so I used a quilting catalog.   I also had no glue (Maine - put on list now) and used nail polish to hold it down!  

#114 Add smiles to these stars.
I had fun doing this, a few are different, if you look closely.

#115 Look outside your window and observe what you see.  Then draw the scene from memory. 
This is not a bad rendering of what is outside the apartment window.
#116 Write down the top 3 places you'd like to visit, and why those places are on the top. 
Yes, I think those are my top 3.  The reasons are similar - food, color, history and sweaters in Ireland!

#117 Visit a garden center or park.  Look at plants individually, rather than seeing a scene as a whole. Focus on drawing one plant at a time.
The drawings are from a desert garden we visited when in Palm Springs - last year.  I had fun doing this one too.

#118 Put on some relaxing music, take a colored pencil in your hand, close your eyes, then draw as you listen to the music
I was sort of looking for awhile, don't know why but it was kind of fun.
#119 Use this page to paint or draw some skies.
I have colored pencils that you can blend.  They work alright - I kind of liked the process.  I have looked for paints to use, but haven't found what I want.  

Not a bad week....  It really is kind of fun ... you can order the book 365 Days of Art(affiliate link) from Amazon and join in the fun any time you like.  

Just a reminder that the Craftsy Unlimited Offer is still good!  Its a great way to learn new techniques...Craftsy Unlimited, watch everything free for one week before you purchase.  I am an affiliate (if you purchase I get a small commission to help defray the costs of my blog).


Linking up to:  365 Days of Art


Tuesday, May 1, 2018

Partners in Design Presents.....Fall into a QAL!

Quilting friends who met in the 2017 New Quilt Bloggers group launched a succesful QAL last year - I Wish You a Merry QAL.  We decided to continue and in so doing, branded ourselves Partners in Design.  We design in many ways - some design the blocks, some their quilts and others just are generally helpful.  Many of the designers who participated last year are participating this year.  

Introducing our new theme:   Fall!  

Like last year, you will get directions for 12 blocks and some possible settings.  The block designers are listed below with the weeks their blocks are released and also if they are a host or not.

Abbie at Sparkle On (Host + Block 11 Designer)
April at JANDA Bend Quilts (Host + Block 2 Designer)
Bobbi at Snowy Days Quilting  (Host + Block 7 Designer)
Jennifer at The Inquiring Quilter (Host + Block 8 Designer)
Karen at Tu-na Quilts, Travels and Eats (Host + Block 9 Designer)
Kathleen at KathleenMcMusing  (Block 5 Designer)<---that's me
Sandra at Sandra Healy Designs (Block 10 Designer)
Sandy at Sandy Star Designs (Block 4 Designer)
Sherry at Powered by Quilting Host + Block 3 & 6 Designer)
Vanda at Quilt in Piece  (Host + Block 1 & 12 Designer)


Here are some of the particulars:

Theme:                        Fall
Dates of QAL:            May 15, 2018 through October 16, 2018
Blocks Schedule:        Every 2 weeks, 12 total
Settings Released:      October 16, 2018
Final Quilt Due:         November 13, 2018
Hosts:                          There are 7 and they are listed below
Fabric:                        These are approximations based on 12 blocks, 2"lattice, 6" border (56x70)
                                                    Scrappy will work!
                                     Blocks: 6 fat quarters (or scraps)  2 dark, 2 medium, 2 light [minimum]
                                     Background:   1/2-1 yard
                                     Lattice: 1 yard
                                     Border: 1 yard or length of quilt if you like straight of grain
                                     Binding: 3/4 yard
                                     Backing:  3 yards pieced or 4 yards for one seam

What else do you need to know:  
WHO?                Anyone who can sew! 
WHY?                TO have fun, win prizes, make a quilt or some blocks
WHERE?           Join the  Facebook group OR follow on Instagram #fallintoaQAL
HOW?                Post a completed block/quilt picture on facebook or instagram #fallintoaQAL
WHEN?              Usually by Monday 11:59pm EST 13 days after release of block
       

Below are some of the prizes that will be awarded (open to international quilters too!). Blocks and prizes for the particular block are announced at the same time.  As with many of the QALs (quilt alongs) more prizes are often added as we go.   Each block will have its own prize and then a Grand Prize for a quilt that is complete (all 12 blocks - top only is fine).  

To keep the contest portion of the quilt-along fair and fun for everyone, only quilts that use all of the designers' blocks will be eligible for prizes. Slight variations are okay, but substituting another block will disqualify you from the giveaway.


So we hope you join in,
share with your friends,
quilt, 
and have fun!!