Thursday, May 31, 2018

Rescued Grandmother's Flower Garden


This is what I am calling a rescued Grandmother's Flower Garden.  A friend found it with a bag of quilts.  We went through the bag, she kept what she wanted.  This top was there, but unquilted.  It had lots of teeny-tine hand stitches holding it together - done as seams rather than English Paper Piecing.  She didn't want it.  So I hatched a plan.  It had been hanging around for awhile so it became part of my One Monthly Goal for May and one of my second quarter goals.  It is done!  HOORAY.

 
Why I did what I did: 
Many people say only do what the original quilter and time would have done - even attempting to find period fabric.  Well, that wasn't in cards.  WHY?  The quilt top was in good condition.  It wasn't important to any one and just wants to be used.  It is not historically significant, but the colors are brilliant as I think it has not really seen the light of day.  My decision -have it machine quilted, bind it and donate it.
I selected a fabric for the back that was the Massachusetts state flower - the Mayflower - made by In the Beginning Fabrics.  It went well enough with the quilt, and I thought honored the hexagon pattern.
Finding a binding was harder, but this print from Henry Glass Fabrics had just the right green and flowers.  So, while more modern it went well enough with the front and the back to work.  The hardest part was deciding how to bind it.  I figured when it cam back from the quilter I would just do it.  And I did.
I trimmed all the edges straight.  This preserved the quilter's intention, but also insured that it got finished.  The binding was an adventure - not too bad - but a lot of turning!  Here are the pointy edges.
Getting ready to turn the binding 
Fold and  line up with next straight edge
Fold and you are ready to sew done the next edge.
Here are the valleys.  My approach was to trim close to the seam line and kind of stretch. The binding became a bit curved.
Look at these fun prints:  a windmill with clogs,  
a dancing couple,
 
a gorgeous rose with an intricate black background 

and an odd print (30s or not????)
Someone will love this quilt. It needs to be washed and dried, which is for another day.  It will either go as a raffle for the church (where I met my friend who gave me this quilt) or as a donation to a woman's shelter or someone getting a new home (refugee or homeless).  I think the quilter made it to be used - and so it will be.  It does fit a queen size bed!!
And Percy approves....

Grandmother's Flower Garden -
Rescued by Kathleen Scargle McCormick
Hand pieced by Anonymous
Longarm Quilter:  Cheryl Dennis
74" x 84"
Destination:  Donation

Linking up with:  One Monthly Goal
                              TGIFF
                              Finish It Up Friday
                              Show Off Saturday
                           

Sunday, May 27, 2018

#365DaysOfArt, Week 20, #134-140

#134:  Draw someone's smile:  Looked at a picture and drew.  I like the way it turned out.
 #135:  Draw Your Favorite Building:  in NYC so why not the Empire State Building?  I think this is pretty reflective of the building for a quick drawing.
#135:  Create a pattern:  Ok you were supposed to use cut out paper.  I had none so I drew a wall I saw.

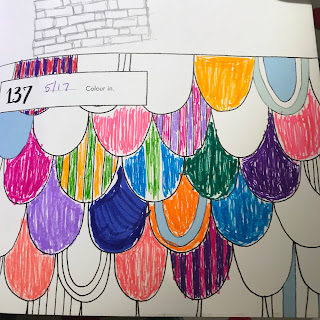
#137:  Color in:  enjoyed doing this, but didn't get to finish.
 #138:  Add more bugs.  I enjoyed it but didn't do a gazillion.
#139:  Calligraphy practice:  Well Amtrak is not the best place to do this but I did enjoy it.
#140:  Telephone doodle page:  I often go for quilting designs - again, rather enjoyable.

Thanks for humoring me and taking a look (a week late).  Doing some catch up on these...

Linking Up:  Powered by Quilting

Thursday, May 24, 2018

Wish Upon A Star


*Indicate affiliate links which support my blog.

I was thrilled to join in on the Wish Upon A Star Blog Hop, sponsored by Carol of Just Let Me Quilt.  The rules are simple enough:  Your project must have a star somewhere on it.  Mine does, and because of indecision it is not a finished quilt but I do have a plan for it.

Happily I am in!  I will be sharing with you my "Sun Star" that I made in a Paula Nadelstern class.   Paula's last name means Needle-Star and in fact, this is very much what this star is. 
In Paula's class, she begins by walking you through drafting a star.  I love drafting and don't do nearly enough of it.  The exercise in understanding how to make your piece is important.  This drawing is part of the piece we used in class that day.
The beauty of this 2 day workshop was learning how to do it, not just making a block.  We would be working with drawing some pieces and understanding the tools she has used over the years.  There is the ruler, small and thin, with one edge a little higher.  Use the lower edge for more precision (WOW! a revelation).  Both her Visigrid* template plastic and the graph paper use 8x8 engineering grid.  It makes it really easy to be precise.  Paula also likes certain pens for marking the template plastic - Faber Castell Multimark 1525 permanent*. This pen is erasable, very helpful as you trace the elements you want to repeat on your fabric.  The silver pen, Uniball*, for marking the fabric works on most colors and is very easy to use. You cut on this line, so you really don't need to worry.  Paula has used them forever and highly recommends them.  
There is no way to explain all that we did, but here is a link* to her book, where you can learn it all!  This one really walks you through the drafting and is a terrific reference.
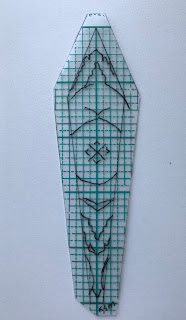
 Here's how the magic happens.  You make this template and mark registration "lines" on it in order to precisely cut out your fabric.  Assembly is honestly pretty easy if you have been at this for awhile.  The fabric must be bilaterally symmetrical in order to make this work.
We had to select the background piece that would make the star sparkle.  Above you see a few tests of fabric.  
And here's a surprise...my friend and I used the same fabric.  The design looks different because of where we fussy cut our fabric.  It then causes one to choose different backgrounds.  Pretty amazing.

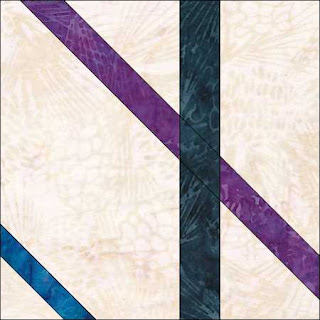
My plan is to make another.... and have a small wall hanging with two of them.  Maybe I should steal my friend's block.  There are also ways of doing it with fewer pieces (I believe these above square from one of Paula's quilts is 4 pieces).

Don't forget to visit some of the other "Star Bloggers".  Everyone's interpretation is different - some are quilts, some are blocks - but they are all unique.  And, there is a giveaway.

May 21

May 22

May 23 - Today

May 24

May 25
Kathleen McMusing  <---you are here


Happy piecing,


Monday, May 21, 2018

Where have I been?


I have been up to a lot of quilty things, but not big finishes or blog entries last week.   I was in NYC over the weekend - as the picture above attests.   It was a gloomy day Friday BUT we were staying in the Garment District (I didn't do the planning - I swear!). I liked the view from the library and windows to the city beyond.  

There will definitely be more blogging this week, but I wanted to catch you up!  Mostly I have been planning.
ISLAND BATIK AMBASSADOR:
My May project was done early and June is designed.  I am figuring out how to piece it - not an easy task and not that hard.  I hope to test a block tomorrow! July is also in process, but I am going to try for one or two more designs before finalizing.

The for August we have what I feel like is a big project - 20 new fabrics - and I am working on a few ideas for it.  I am looking for a way to display all 20 and trying to decide whether the pieces I have can be background or whether I need more background.  

UFOs 
I have been working on two - my GFG (Grandmother’s flower garden) and an appliqué project.  The flower garden will be finished for May, the appliqué project in June.  The binding is on the GFG and nearly sewn down - hope to be done at the end of the week.


QALs
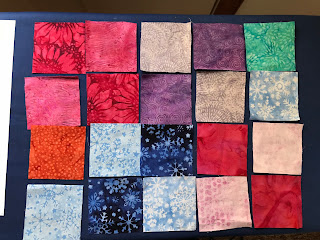
I am active in a 4 right now - Yikes!  Above is a fabric pull for Sandra's Playtime Plus QAL (#1)  It already began, but you could still catch up.  I also hopped on board with Tish's Adventures in Wonderland's QAL (#2)

FallintoaQAL(#3) is being brought to you by Partners in Design and it began on Tuesday, May 15.  Every two weeks a block is released and you will be able (if you like) to complete your quilt before the fall! You can join anytime and there are prizes for blocks and for finishes.
Wish Upon A Star(#4) began today.  Go to Just Let me Quilt to begin following all these great quilters.  I am up on the blog Friday!

Blocks for a Bee project
I have been working on blocks for a bee project. Two are done (see one of them above).  One is nearly finished.  These are from Made by Marney - she has so many patterns for different animals, all easily accessible with a click!  Also, the Labradoodle on her dog quilt is my Percy, see more here on my blog and on her blog.


NYC
I was with family for the weekend - a women only weekend away.   The real bonus was being in the Garment District.  They didn’t know what they were in for!  It was a rainy nasty day, but we persisted.

MOOD!  
Ok Project Runway fans - I was there!  I so loved it.  IT is a huge store with an immense amount of too-die-for-fabric.  I didn’t buy any but purchased a wonderful felted wool bag.  Do I need another bag?  There were a ton of Liberty fabrics, and if I had known, I would have planned on filling out my stash as I have a project in mind. 

Gotham Quilts! 
What a great store.  The added bonus was seeing this gorgeous quilt - Jennifer Strauser pieced and quilted it.  An added bonus was meeting Justin Keaton, a wonderful and talented quilter, who was filling in for some of the regular shop workers.  We are now following each other.
Such a great bad, and a few purchases!

***Side note:  explaining blogging/instagram/facebook to those who don’t do it is really difficult.  

You will see me later this week!  Promise.

Linking Up:  Main Crush Monday with Beth at Cooking Up Quilts.


Thursday, May 10, 2018

Orange Peel Pillow - 2 for 1 month


This fun project is a combination of work for 2 groups.  Island Batik provided the fabric and the International Association of Quilters gave me the pattern to work up as a project lead for this freebie for members.  

The challenge for Island Batik this month was to make a pillow.  I thought the project from IAQ was just perfect. First up - picking fabric.
First, I laid them out in what I thought was a pleasing order.
Per the instructions, I sewed background and "peekaboo" fabric together.  
Here is what the back looked like.  Then I decided to add another row, in order to make a square pillow.
I auditioned a few of my scraps, and then added the rows like I did before.  My fabric choices were dictated by which Island Batik fabrics I already used and had some scraps.  This is my first year as an ambassador, so I am being a bit conservative with my larger pieces until I have a sense of what I will need through July.  
 Mark the orange peel, lightly, on the fabric.  I am partial to Sewline pencils, but whatever you do, use a light touch.  You can see the marked orange peels on the assembled quilt.  I cut on the line - so no remnants are left behind.  Remember:  what you see is what you get!

WHEN MARKING THE ORANGE PEELS:
Think about seams and quilting through them later - give yourself 1/4" near the seams to save you some difficulty in quilting later.
The orange peels
With the centers removed
I make a tiny slit first, cutting very carefully the slit in the center of the top fabric.  Then I cut towards the side and around, which will reveal the orange peels.  Trim nicely, as these edges don't get turned under.  Some reverse appliqué does, but this pattern did not call for that.

The next step is to layer with batting and a backing, I used safety pins to hold it together because I was hand quilting.   Since mine was going to be a pillow I didn't worry too much about the fabric I used in the back.  I quilted with a variegated 12w thread from Valdani.  I tried to get my stitches more even on the front than on the back, again knowing this was going to be a pillow.  

HINT:  use a needle that can be threaded with the weight thread you will use AND can easily go through your layers.  I had to try a few until I found one I liked (remember batiks are a little harder to quilt but the right needle helps).


I then picked a binding.  I needed 48 inches so I needed more than one strip - so I used the reverse of a Christmas batik in red, as I liked it the best.  Sometimes there are two sides to a batik, and sometimes you need to use the back side

I decided to use the envelope method, so I first cut two pieces that were about 12.5" x 15".  I turned one edge on each down, pieces now measuring about 10".  I then top stitch along each edge.  Sandwich on and sew on the binding to the front.  Hand sew to the back.

HINT #1:  I like bigger pieces so "the belly" of the pillow doesn't peek out!

HINT #2:  Backing and Binding are sewn together.  WRONG sides together for front and back.  The binding is attached to front and turned to back (like most quilts).

A simple pillow insert was made with poly fiberfill.  I measured the pillow from the back and made the insert that size (2 pieces cut 12" square).  Sew up on three sides.  Stuff and test the insert in your pillow, add more fill or not, close up the insert!  Stuff it into the pillow and you are done!

Voila - your pillow is done!